
market@chinacoalintl.com
1. Structure and basic principle of rebar detector
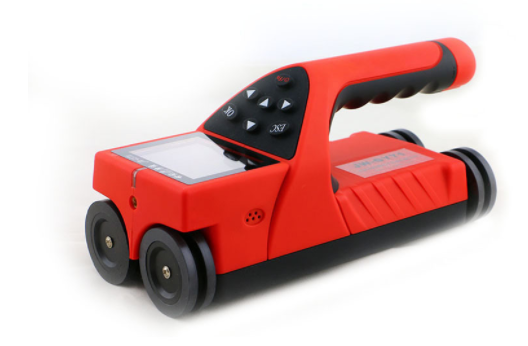
The integrated rebar detector is a kind of portable intelligent nondestructive testing equipment, which is used to detect the construction quality of reinforced concrete structures. It can detect the thickness of the protective layer of steel bars, the position, direction and distribution of steel bars. It can also detect the magnetic body and conductive body in non-magnetic and non-conductive media.
2. Check the position of beam members and the thickness of protective layer
The signal value received by the instrument changes relatively little due to the dense reinforcement spacing, and the thickness value of the protective layer shows even less or no change. Most instruments do not measure automatically.
Methods: to determine the position of the stirrup, move the sensor at a slow and uniform speed in the middle of the stirrup with large spacing, and determine the position of the reinforcement manually. Repeat the scan in the opposite direction, and the two scans verify each other. For the sake of prudence, it is best to repeat the above measurements between the other two upper reinforcement bars to verify the results and to orientate the reinforcement bars accurately.
3. Field test of steel bar protective layer thickness -- electromagnetic induction method
According to GB 152-2008, when the thickness of concrete protective layer is 10~50mm, the allowable error of detection of concrete protective layer thickness is ±1mm, and the allowable error of reinforcement spacing is ±3mm
Operation method
1) rebar detector connection: connect the main engine and probe with signal cable, tighten the fixing screw of the plug. Each time the probe should be connected before starting, so that the probe can be determined by the rebar detector. Please grasp the root plug!
2) start up and preset: press [on/off] to start up the rebar detector and enter the option menu automatically. The steel bar diameter is then preset.
3) zeroing: put the probe in the air, leave the surface of concrete members and metal objects at least 30cm, and check whether the rebar detector deviates from the zero state when zeroing.
4) reinforced location and covering thickness measurement: the probe parallel to the steel bar, concrete surface in the initial part of the surveyed area position, moving along the vertical direction of reinforced concrete surface probe, moving process, the article indicates the growth, protective layer thickness value decreases, and that the probe is moving to the reinforced location, when steel axis and the center line of the probe coincidence, article indicates the maximum and minimum protective layer thickness, read the first detection of concrete cover thickness readings, measured reinforcement in the same location should be repeated testing, read the second concrete cover thickness readings. At the same time, the steel bar axis position marked out. After testing the thickness of the protective layer of the steel bars in the test area, the spacing of adjacent marked steel bars is measured in turn.
4. Matters needing attention during testing
(1) in the process of operation, the rebar detector should be handled gently, in strict accordance with the instrument operating procedures.
During the testing process, the steel joint and wire binding should be avoided. When the difference between the two values of the thickness of the concrete protective layer read at the same place is greater than 1mm, the test data of this group is invalid, and the reason shall be found out, and the test shall be retested there. If the requirements are still not met, the rebar detector should be replaced or the method of drilling and chiseling should be adopted for verification.
(3) the detection process can be used under the probe additional pad method for detection.
The moving speed of the probe shall not be more than 2cm/s, and the probe shall keep a constant speed as far as possible to avoid moving in the opposite direction before finding the reinforcing bar, otherwise it will cause a large detection error or even leakage of the bar.
If the continuous working time is long, in order to improve the detection accuracy, should pay attention to every 5 minutes to the probe into the air, away from the metal, press the confirm key reset. If there is any objection to the test result, this operation can also be performed.
6. Correct setting of reinforcement diameter, otherwise affect the test results.

© Shandong China Coal Group. © 2017
Address: No. 11, North of Kaiyuan Road, High-tech Zone, Jining City, Shandong Province, China
sales@chinacoalintl.com
Executive Editor: Zhang Wen / Editor: Linda Zhang